a girl and her bread: a sourdough story
I would have never learned to bake sourdough bread in my past life. Pre-quarantine me was very busy, and I certainly didn’t have time to start something as time-consuming or challenging as baking temperamental bread. Sourdough requires patience, time, practice, and mistakes. I’m a perfectionist at heart, and I usually have a packed schedule, so I never feel like I have time to fail. But here’s the thing, I WANT to be good at failing, as counterintuitive as that might sound. I’ve read tons of articles and listened to experts explain that a huge key in a successful life is grit, the ability to fail and move on from mistakes and keep trying. These days, sourdough has been my low-stakes way of learning to be more comfortable with failing, learning to flex the muscle of trying again and again even when I’m frustrated. This is part one of my sourdough journey, I hope you find it helpful and encouraging that I didn’t wake up baking perfect bread right away (and honestly, I’m not sure I’ll ever make perfect bread, and that’s ok).
I started off by inheriting a starter from a friend who is a chef, and as soon as I got home from picking it up I had a mild panic attack. I had NO IDEA how to keep it alive. I fell into an internet hole of excess information. Do I refrigerate it?! Do I feed it twice a day? How much to feed it? OMG THIS IS TOO MUCH. But then thankfully my baking angel brother-in-law came to the rescue and face timed me and walked me through these initial steps. Whew. I settled on keeping it fed twice a day for now, a smaller amount at night and a larger amount in the morning (more specifics on that later). When I go back to normal life I’ll probably keep it in the fridge and feed it once a week.
I think the best way to go from here is to just show you the evolution of my attempts! I realized early on that there are so many variables to this process, it would be best if I kept a record of what I did each time and if it worked. I decided to start with the recipe for the Tartine Country Loaf and I just divided everything in half for my first several tries so I wouldn’t waste an absurd amount of flour. So here goes…
Round 1:
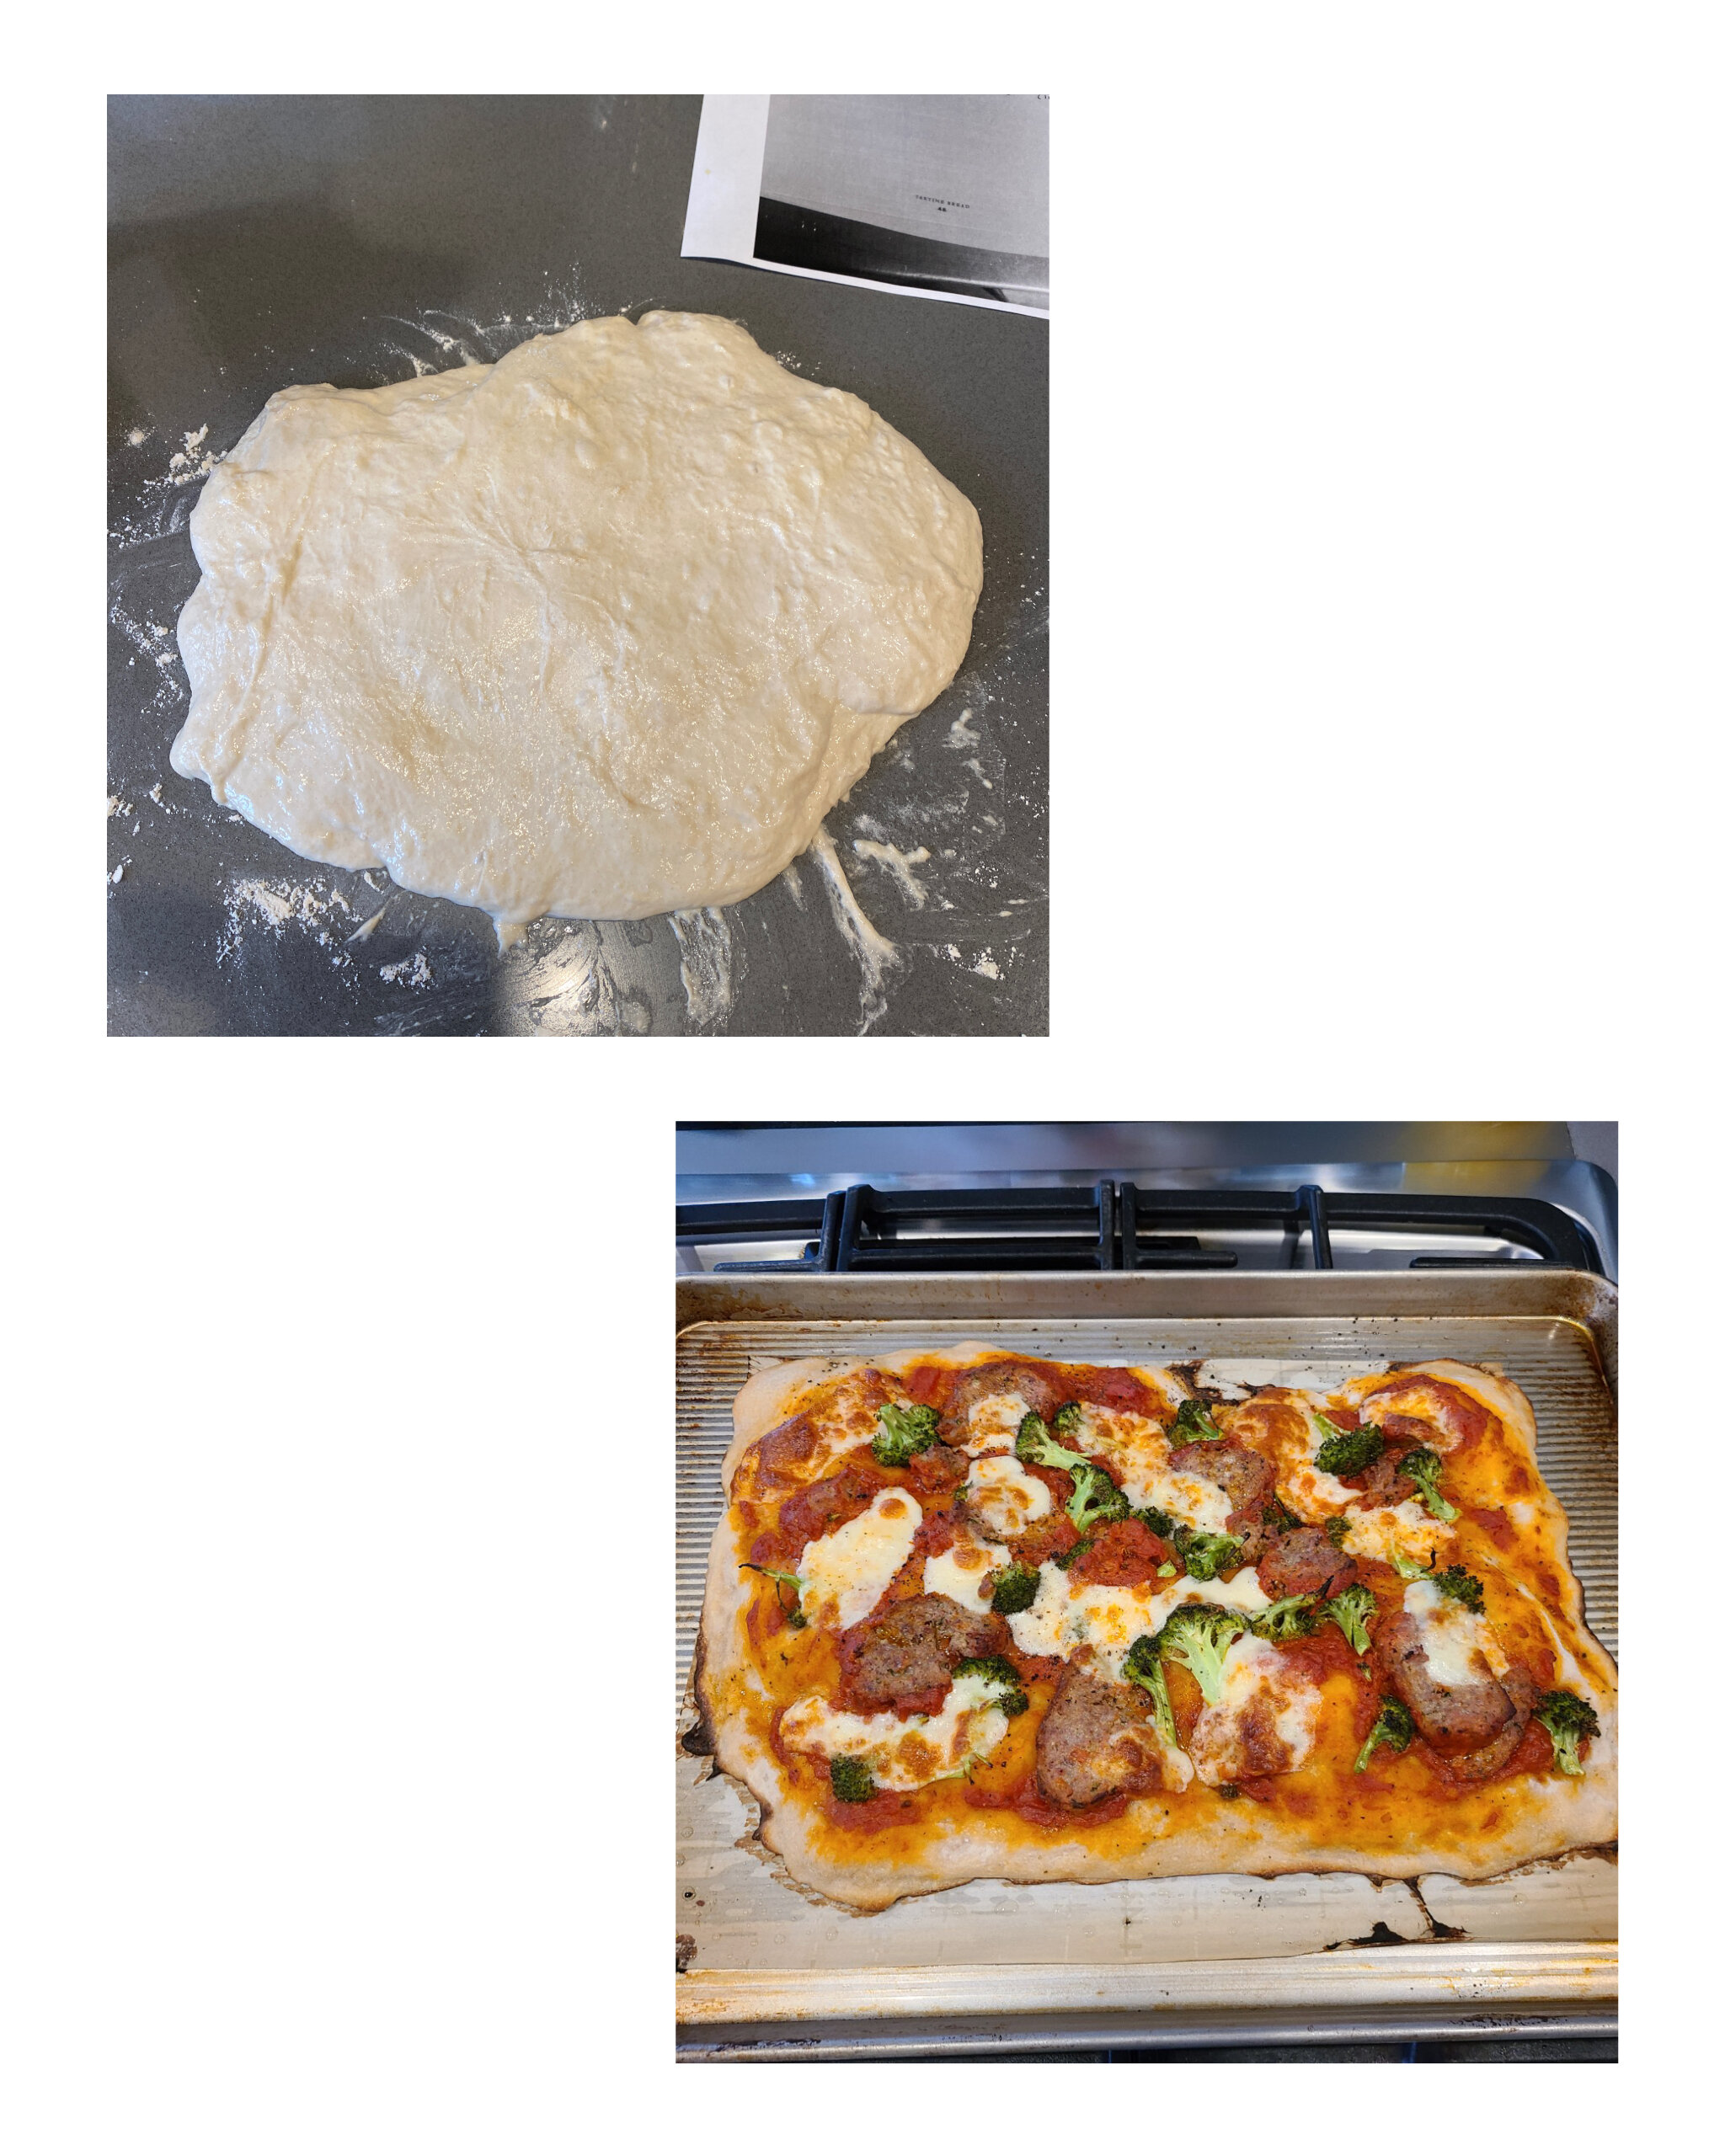
Right off the bat, I miscalculated and added TOO MUCH WATER. The dough was way too wet and I ended up just using it for pizza dough, which was delish.

Round 2:
This round went much better than the first! I did my math correctly and followed the Tartine recipe verbatim. The dough was VERY wet and sticky though, so it was a huge surprise when the bread turned out decently well. So at this point, I thought, this is it! I’ve got this down! Haha, wrong!
Round 3:
I did everything similarly to round 2, but wait! It didn’t work well! The bread was flat, it was super dense and chewy on the inside. This is when I realized that there are so many factors you have to take into consideration: temperature, time, how you handle it, etc. I was still working with the exact Tartine recipe at this point, which is 75% hydration, and the dough was super sticky and very hard to handle. I also let this one over-ferment too much I think, hence the huge holes but dense texture.

Round 4:
I did a facetime class with Javi (my baker brother-in-law) and got to watch his technique and that helped immensely. I realized that I had been keeping my dough too cold (my kitchen was around 69 degrees) and not working it enough to develop the gluten. I tried to recreate his technique when I was shaping the loaf, but it was so wet and goopy it was nearly impossible. I put it in the fridge to proof overnight and hoped for the best! It rose more than round 3 which was nice, but still was pretty dense and not that tasty.

Round 5:
SUPER WET and hard to handle! Talked to Javi and realized that 75% hydration is just too high for the bread flour I’ve been using (and my beginning skill level). I decided to just cut my losses and gifted this to my sister-in-law to use as pizza dough.

Round 6:
As you can probably imagine, I’m VERY frustrated at this point. I’ve spent nearly a week and several pounds of flour making super mediocre bread, and I’m getting impatient. I consult with Javi and decide to recalculate the recipe to be a lower hydration. I turn it into a 65% hydration recipe and type up the whole thing to work off of. I clean up my bread station, roll up my sleeves, and start again. And you know what, IT WORKS. It finally works. The lower hydration turns it into a dough that feels like DOUGH. It allows me to actually fold it well, to shape it well, and to handle it without feeling like I’m covered with a slimy mess. I feel like I finally am getting the hang of this, and it is amazing. Now the trick will be to see if I can do it again…
Round 7:
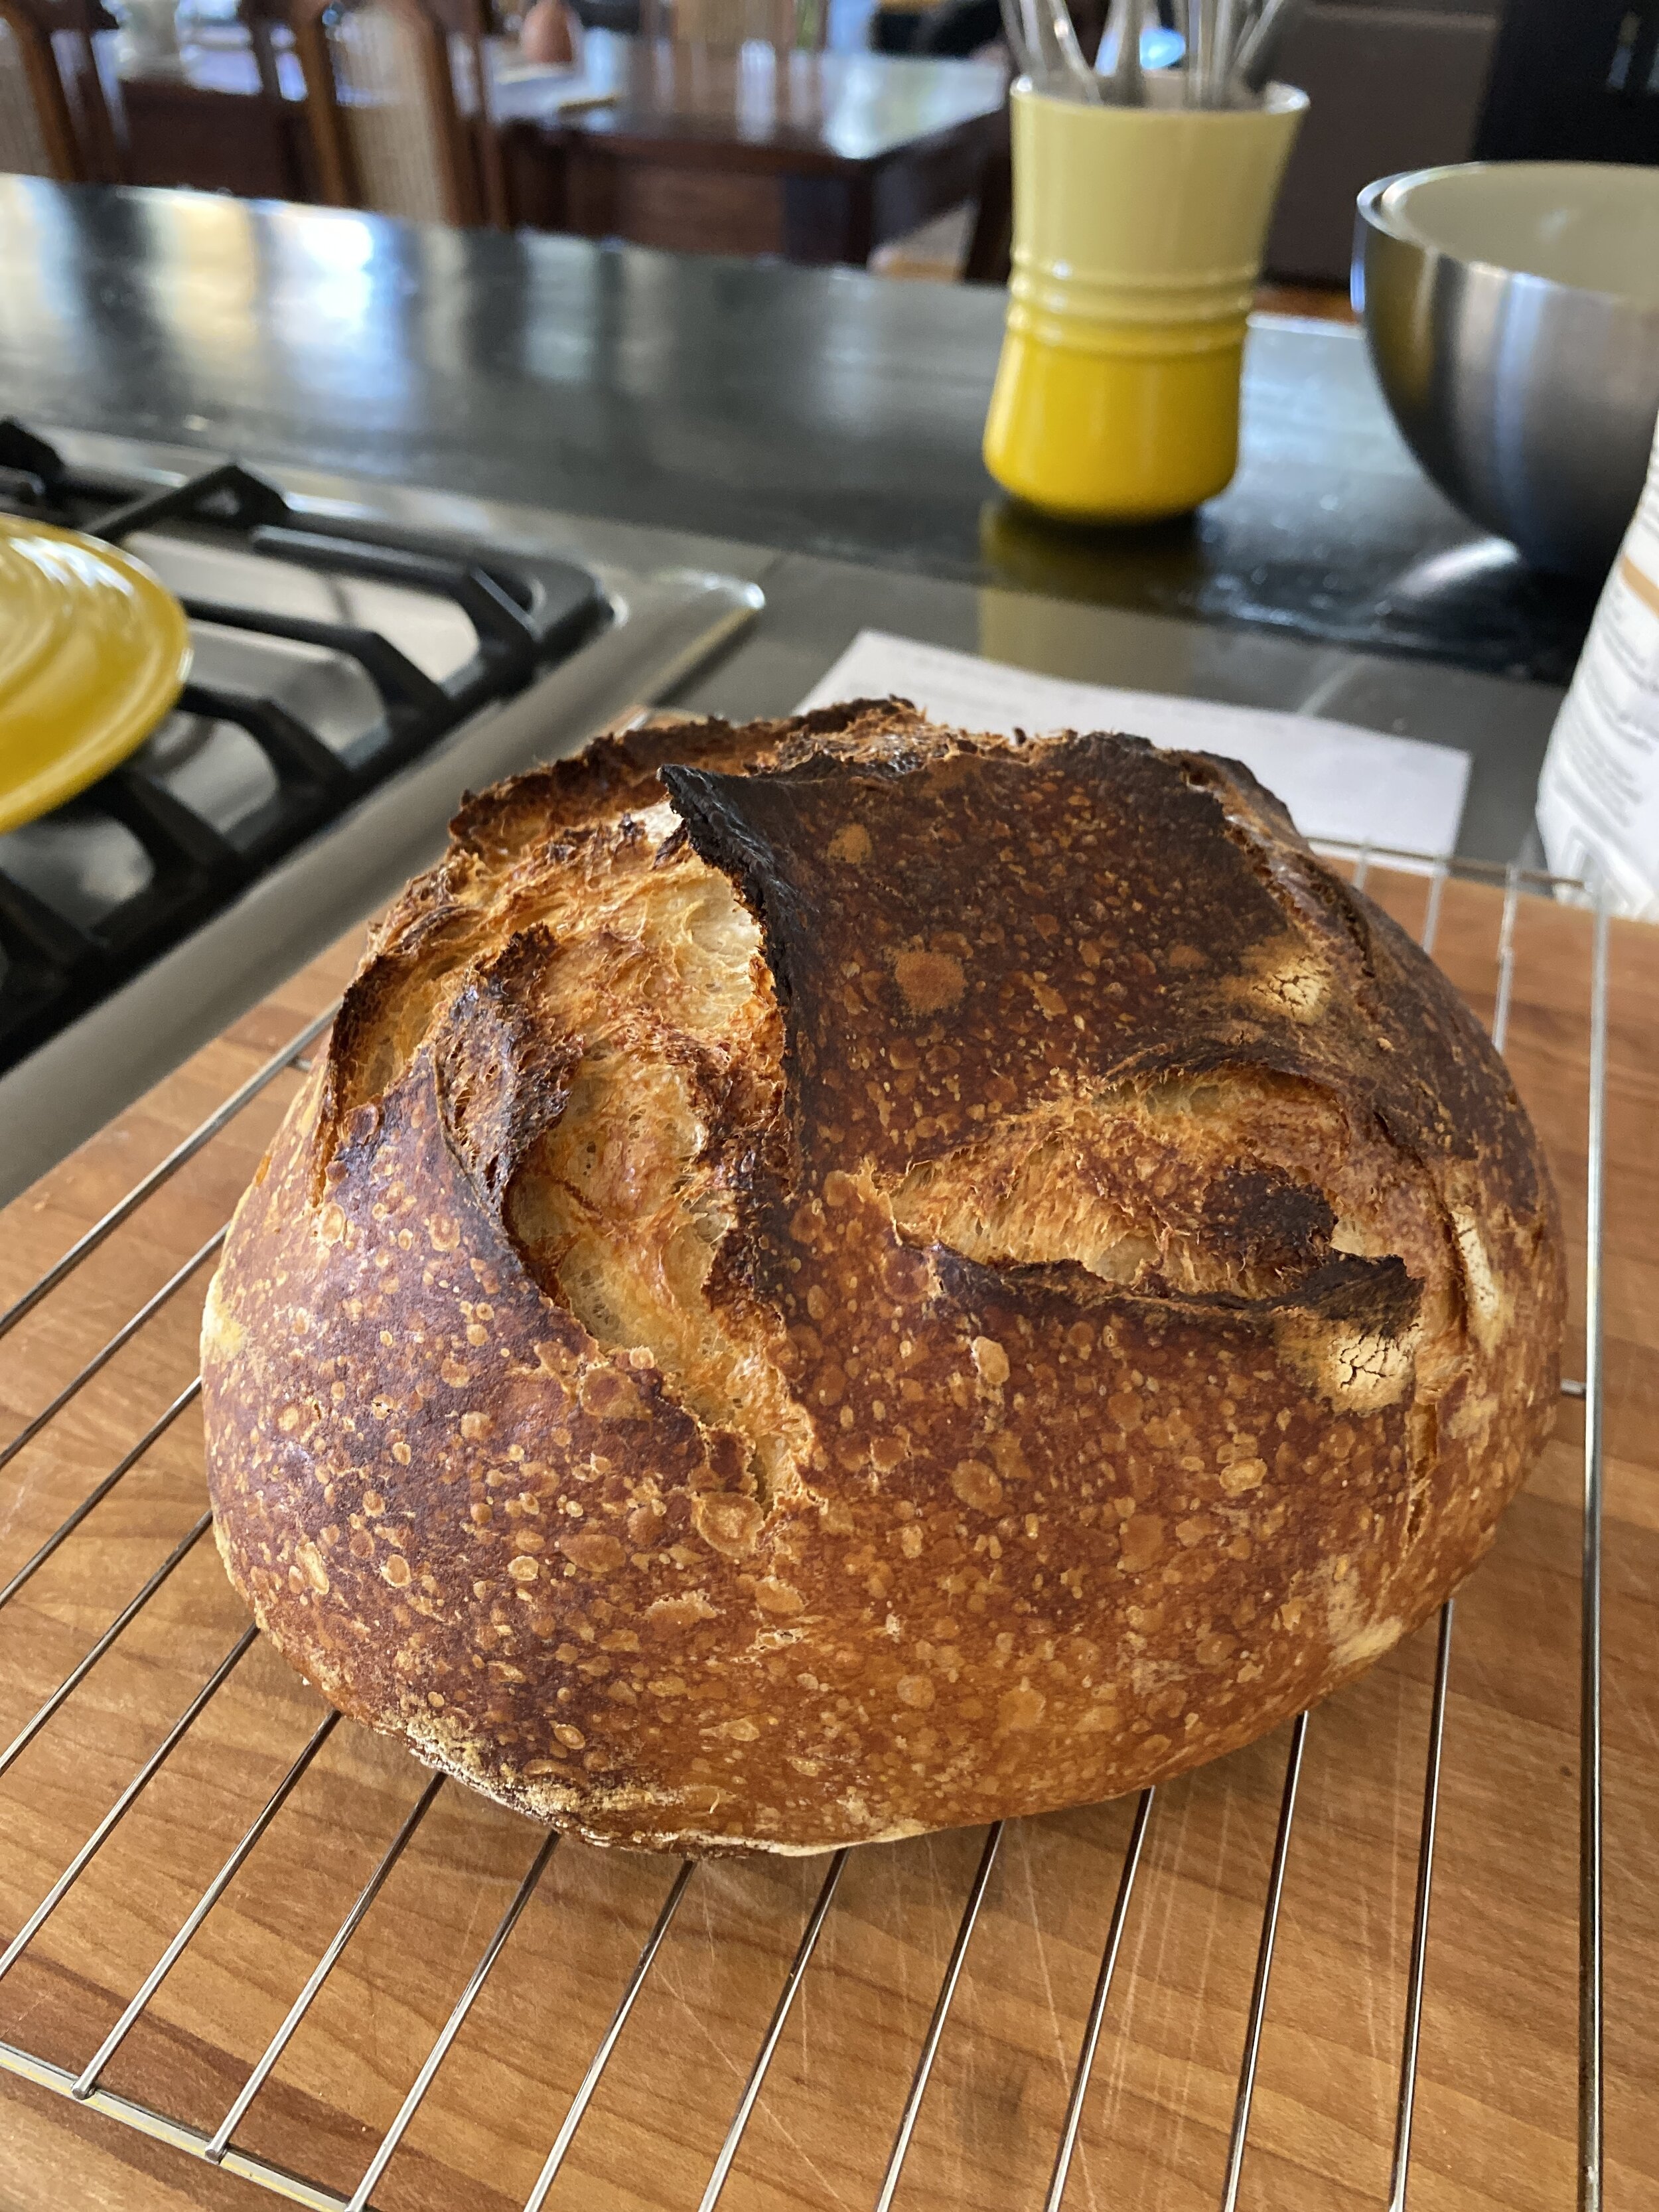
I followed the exact same recipe as the day before just to see if I could recreate another good loaf, and it worked! It’s not perfect, the texture is a little fluffy (vs. kind of sticky and chewy) and the flavor is kind of meh, but the loaf rose well and the crumb looked beautiful so it’s overall a win! I could be browning them more to create a crunchier crust, so I’ll keep it in longer next time.

Round 8:
In an effort to make the bread tastier, Javi suggests I increase the amount of whole wheat flour and add a little extra salt. I increase the flour mix to 20% ww/80% bread flour, and I add an extra gram of salt. I also adjust the baking time - I’d been doing 20 minutes with the top on and 20 with the top off, and Javi suggests a baking ratio of 2/3 of the time with the lid on and 1/3 of the time with the lid off, so I adjust to that. After taking the bread out of the dutch oven, I put it back directly on the rack to brown a little more and I think the crust is great. The taste is also by FAR the best yet.

Round 9:
I decide to start making two loaves at once! My current process takes about 24 hours to make a loaf, so I’d love to get two loaves instead of one out of that amount of time and energy. The end product is great, only issue is I didn’t reheat the dutch oven well enough before baking my second loaf so it turned out kind of flat.

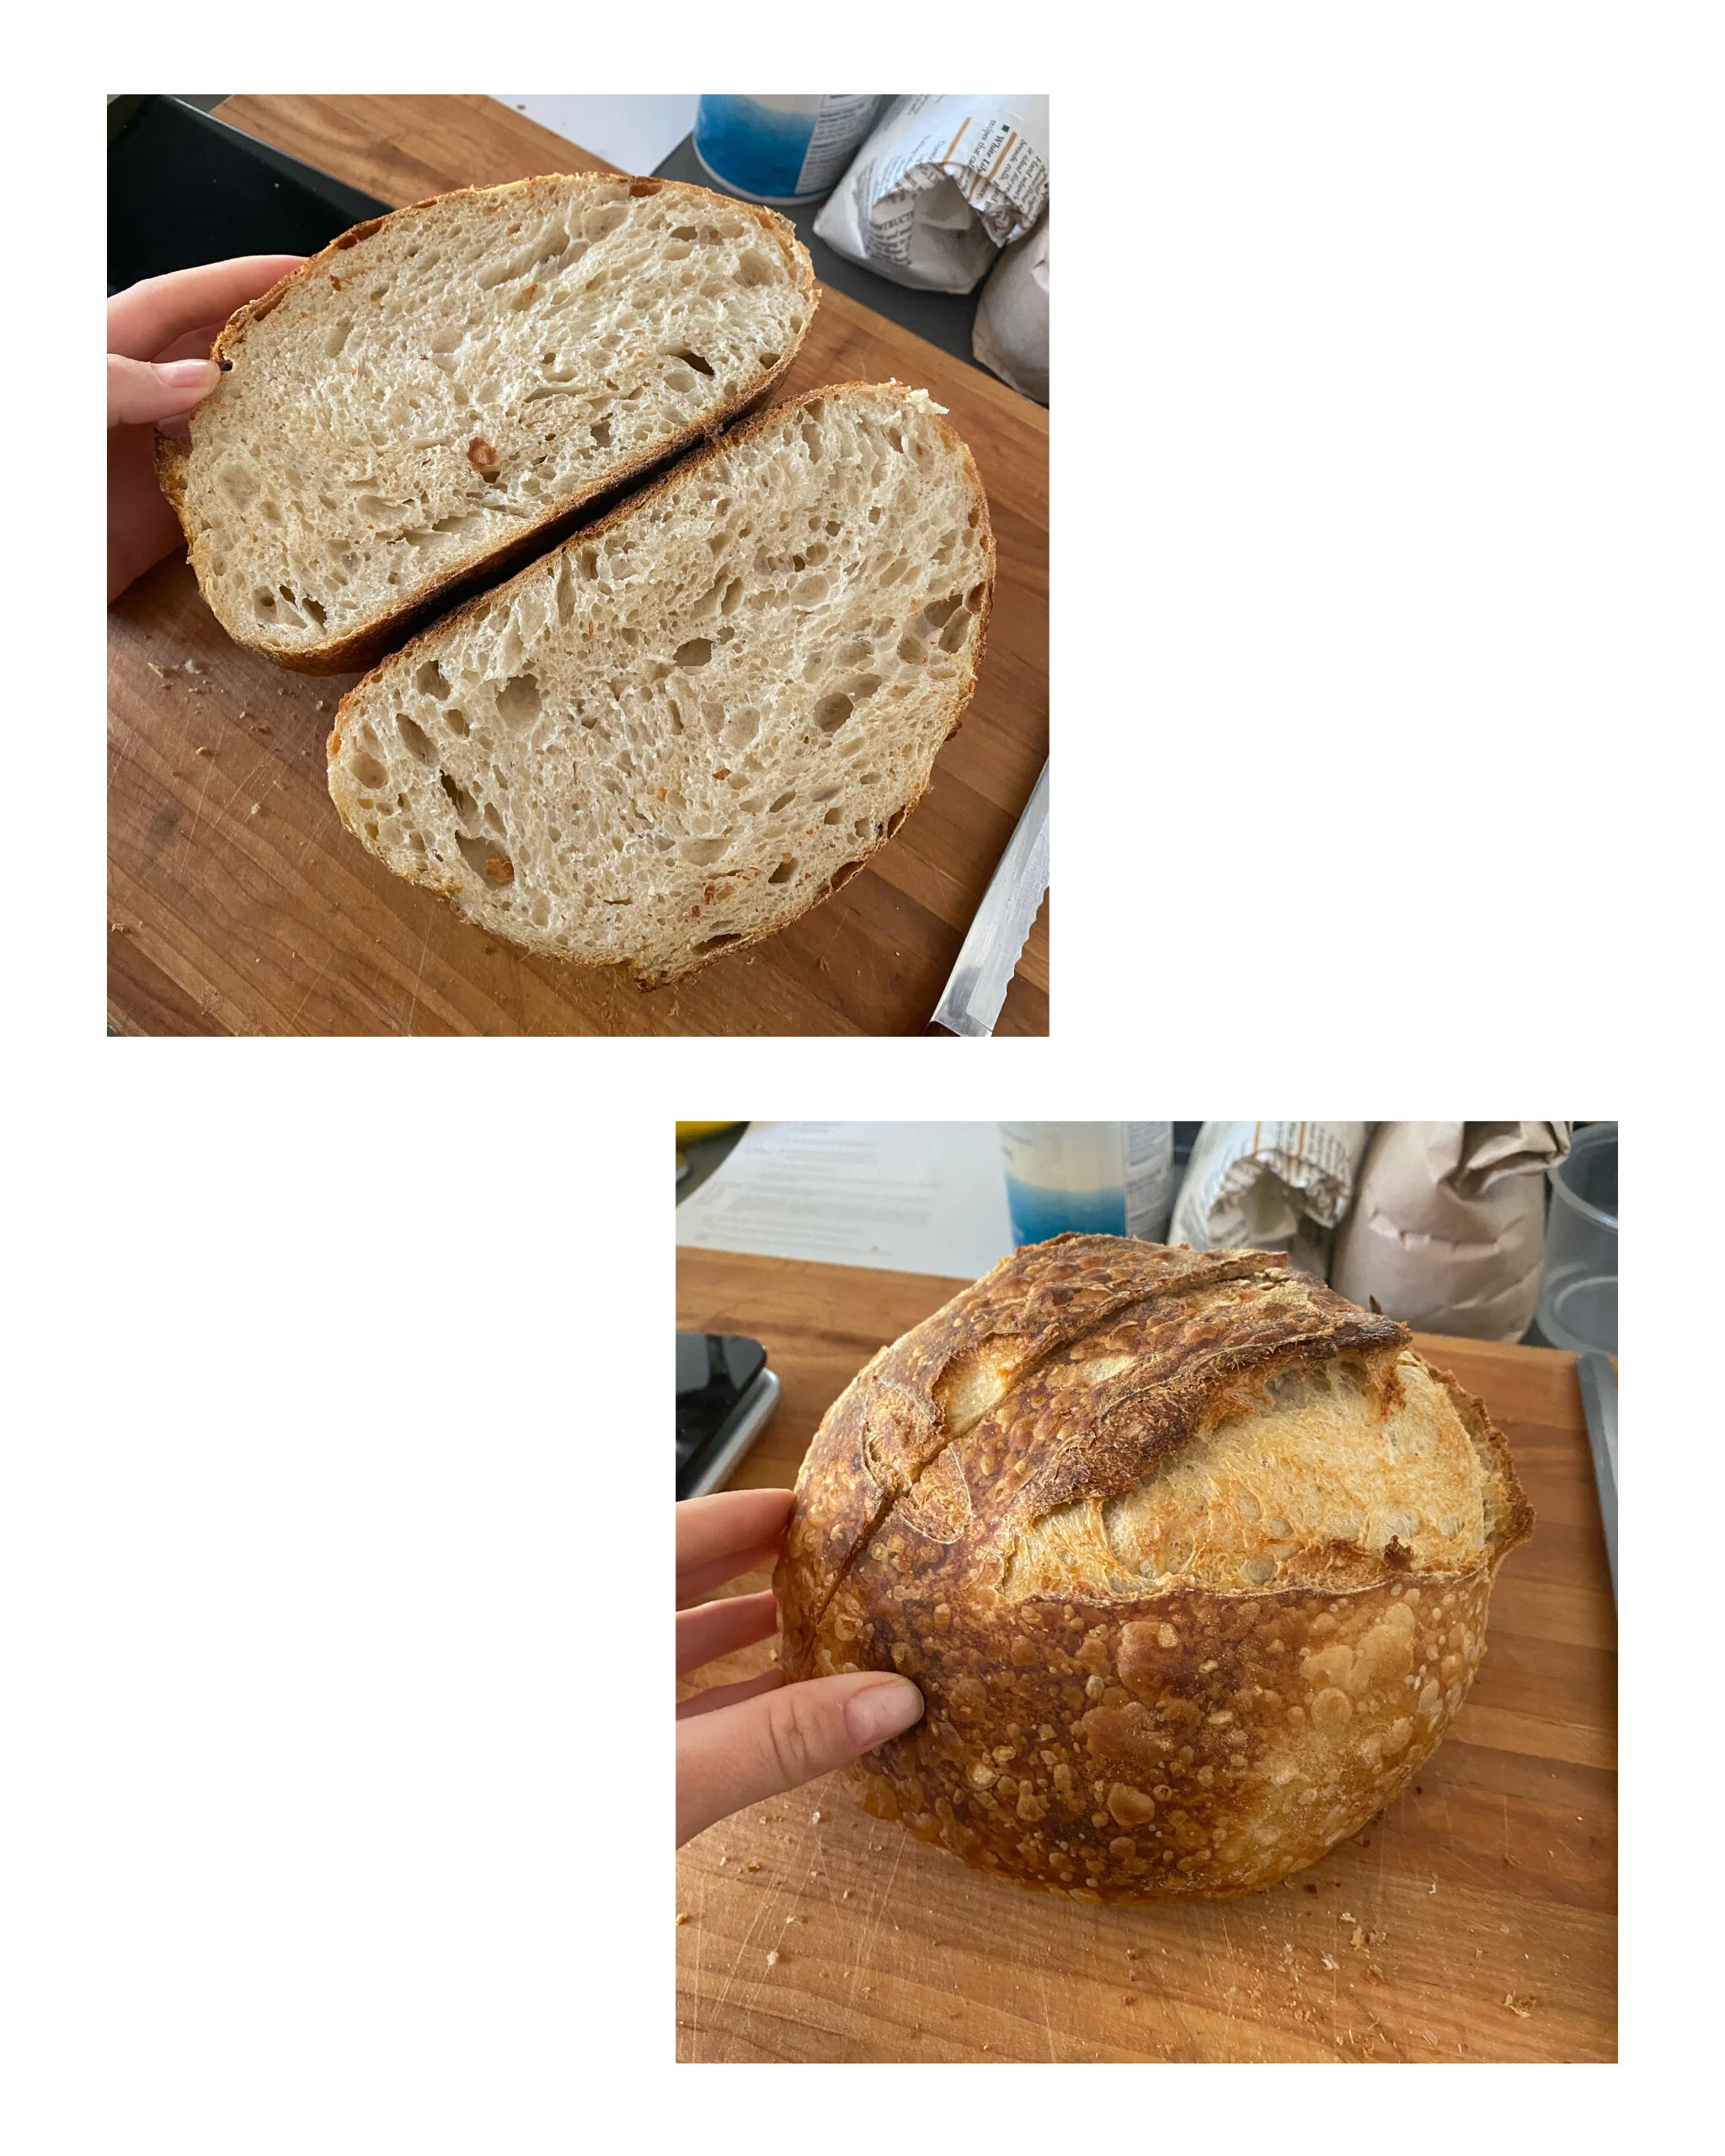
Round 10:
I’m feeling pretty confident at this point, so I adjust my recipe slightly. I change it to 30% whole wheat and I up the hydration to 70%. It works beautifully. I’m getting the hang of it! I give my first full loaves away and a friend calls the bread “magic.” That’s the cool thing about sourdough. As you continue to feed and take care of your starter, it gets stronger and better. I feel like I’m really getting the hang of watching it and taking care of it, and I am tasting the difference in my loaves.

Rounds 11, 12 & 13:
I stopped documenting as thoroughly here because I wasn’t changing anything in the recipe or process. I made two loaves each round, and I mostly focused on improving my technique. I’m learning how to work the dough so it responds well, I’m learning how to handle it when it’s sticky, I’m learning how it likes to be scored. I still don’t have my bread-proofing baskets or a proper scoring tool, so I’m excited when those come in the mail and I can be a profesh baker! Gave most of these loaves away to family and friends and I think I’m addicted to sharing with people :)

Round 14:
ALL OF A SUDDEN, I ran low on bread flour. I thought I could just pop over to Surfas and pick up more, but they’re out and everywhere else I checked online is also out. I have some AP flour at home, so I’m going to start using more of that until I can get my hands on bread flour. I could definitely just stop making bread for a week, but I don’t want to! I’m in the swing of it finally, it’s a very relaxing practice that builds structure into my days at home, and I think that practice and consistency are the two things that will help me get really good at this. So for this round, I used 30% whole wheat flour, 20% bread flour, and 50% AP flour. The loaves didn’t rise quite as much, and the final product is a bit denser than the previous loaves. It’s still delish, but I’d like it to be slightly lighter in texture. I’m going to try adding more levain next time to see if that helps lighten it up a bit.
To end my recap of this journey, I’m going to leave you with the recipe that seems to be working for me right now. I’m not an expert of course, and everyone has different ways of baking sourdough so there are probably 1000 other ways that work, but here’s what’s working for me now if it can be of any help to you!
SOURDOUGH COUNTRY LOAF - 70% HYDRATION
Ingredients:
200 g bubbly sourdough starter
650 g 100 degree water + 50 g 100 degree water
300 g whole wheat flour
700 g bread flour
22 g sea salt
olive oil
a mix of whole wheat and rice flour for dusting
Directions:
The night before you want to bake, feed your sourdough starter like normal. I like to do 25 g starter + 50 g flour (I do a 50/50 whole wheat + bread flour mix) + 50 g room temp water.
In the morning, I make my levain. I mix all of the sourdough starter I have from the night before (it’s usually right about 125 g) + equal amounts flour and water. So that would be 125 g starter + 125 g flour mix + 125 g water. The trick is to use warm water here. I use a meat thermometer and bring the water to exactly 100 degrees Fahrenheit. This helps the levain grow more quickly so it will be ready in a few hours. You know it’s ready to use when it’s doubled in size and is super active and bubbly.
In a large bowl, mix 200 g of your levain with 650 g of 100 degree water. Use your hand to squish the starter into the water and mix it together. Then add your flour and use your hand to mix it all together until all of the flour is absorbed into the mix. It will be pretty sticky and shaggy, just do your best to wipe as much off your hand as possible. Cover this mix with plastic wrap and let it chill out for at least 30 minutes. This part of the process is called the autolyse, it’s where the flour gets a chance to fully hydrate. It’s also where I can be kind of flexible with my day - I’ve let my dough autolyse for up to three hours and it turned out great, so if you need to go run an errand or go on a walk or something, do it now!
Once the dough has autolysed, add in the salt and the additional 50 g warm water. Use your hand to squish it around super well until it’s all fully mixed.
Get out a clean bowl and rub a small amount of olive oil around the inside, just enough to coat it. Transfer the dough into this clean bowl. Clean your hands, and leave them a little wet as you do your first fold. Here’s a video that shows you how to do the folds, it’s much easier to just watch it vs. me explaining it. You want to fold the dough over from all four corners, and then flip the whole thing over and cover it with plastic again. The point of this is to start developing the gluten strands in the dough.
Now the part of the process called the Bulk Ferment starts. I’ve had good luck doing this in a warm place and keeping my dough around 82 - 86 degrees Fahrenheit during this process. The easiest way to achieve this is to carefully fill up a big pyrex measuring cup with super hot (almost boiling water) and put it in a cold oven with my covered bowl of dough. I also usually keep the light on, which helps keep it warm in there. I use a meat thermometer to measure the temp of the dough every time I do my folds, and this helps me adjust accordingly to make sure it isn’t too warm or too cold in there.
I like to repeat this folding process 3 - 4 more times over the next 3 - 4 hours. My schedule might look something like this:
4:00 pm - do the mix, transfer to a new bowl, fold and put in cold oven.
4:00 pm - fold #1
5:00 pm - fold #2
5:30 pm - fold #3
6:00 pm - fold #4
6:00 pm - 7:00 pm - finish bulk ferment
Each time you do the folds, you should notice your dough getting more elastic and easier to work with.
Continue to let your dough ferment until it has puffed up around 30% or more. If you’re keeping the dough warm like I do, the entire bulk ferment process takes around 3 hours or so.
Lightly flour a clean surface and carefully scoop your dough out. Use a floured bench scraper to divide the dough in half. I like to shape each one into a taught ball at this point. If it’s too sticky or feels like it’s not working right, sometimes I will shape the dough balls and then cover them with a towel to let them rest for 30 minutes before shaping them again. This allows the dough to rest a bit and makes it easier to work with. Here’s a video on how to shape!
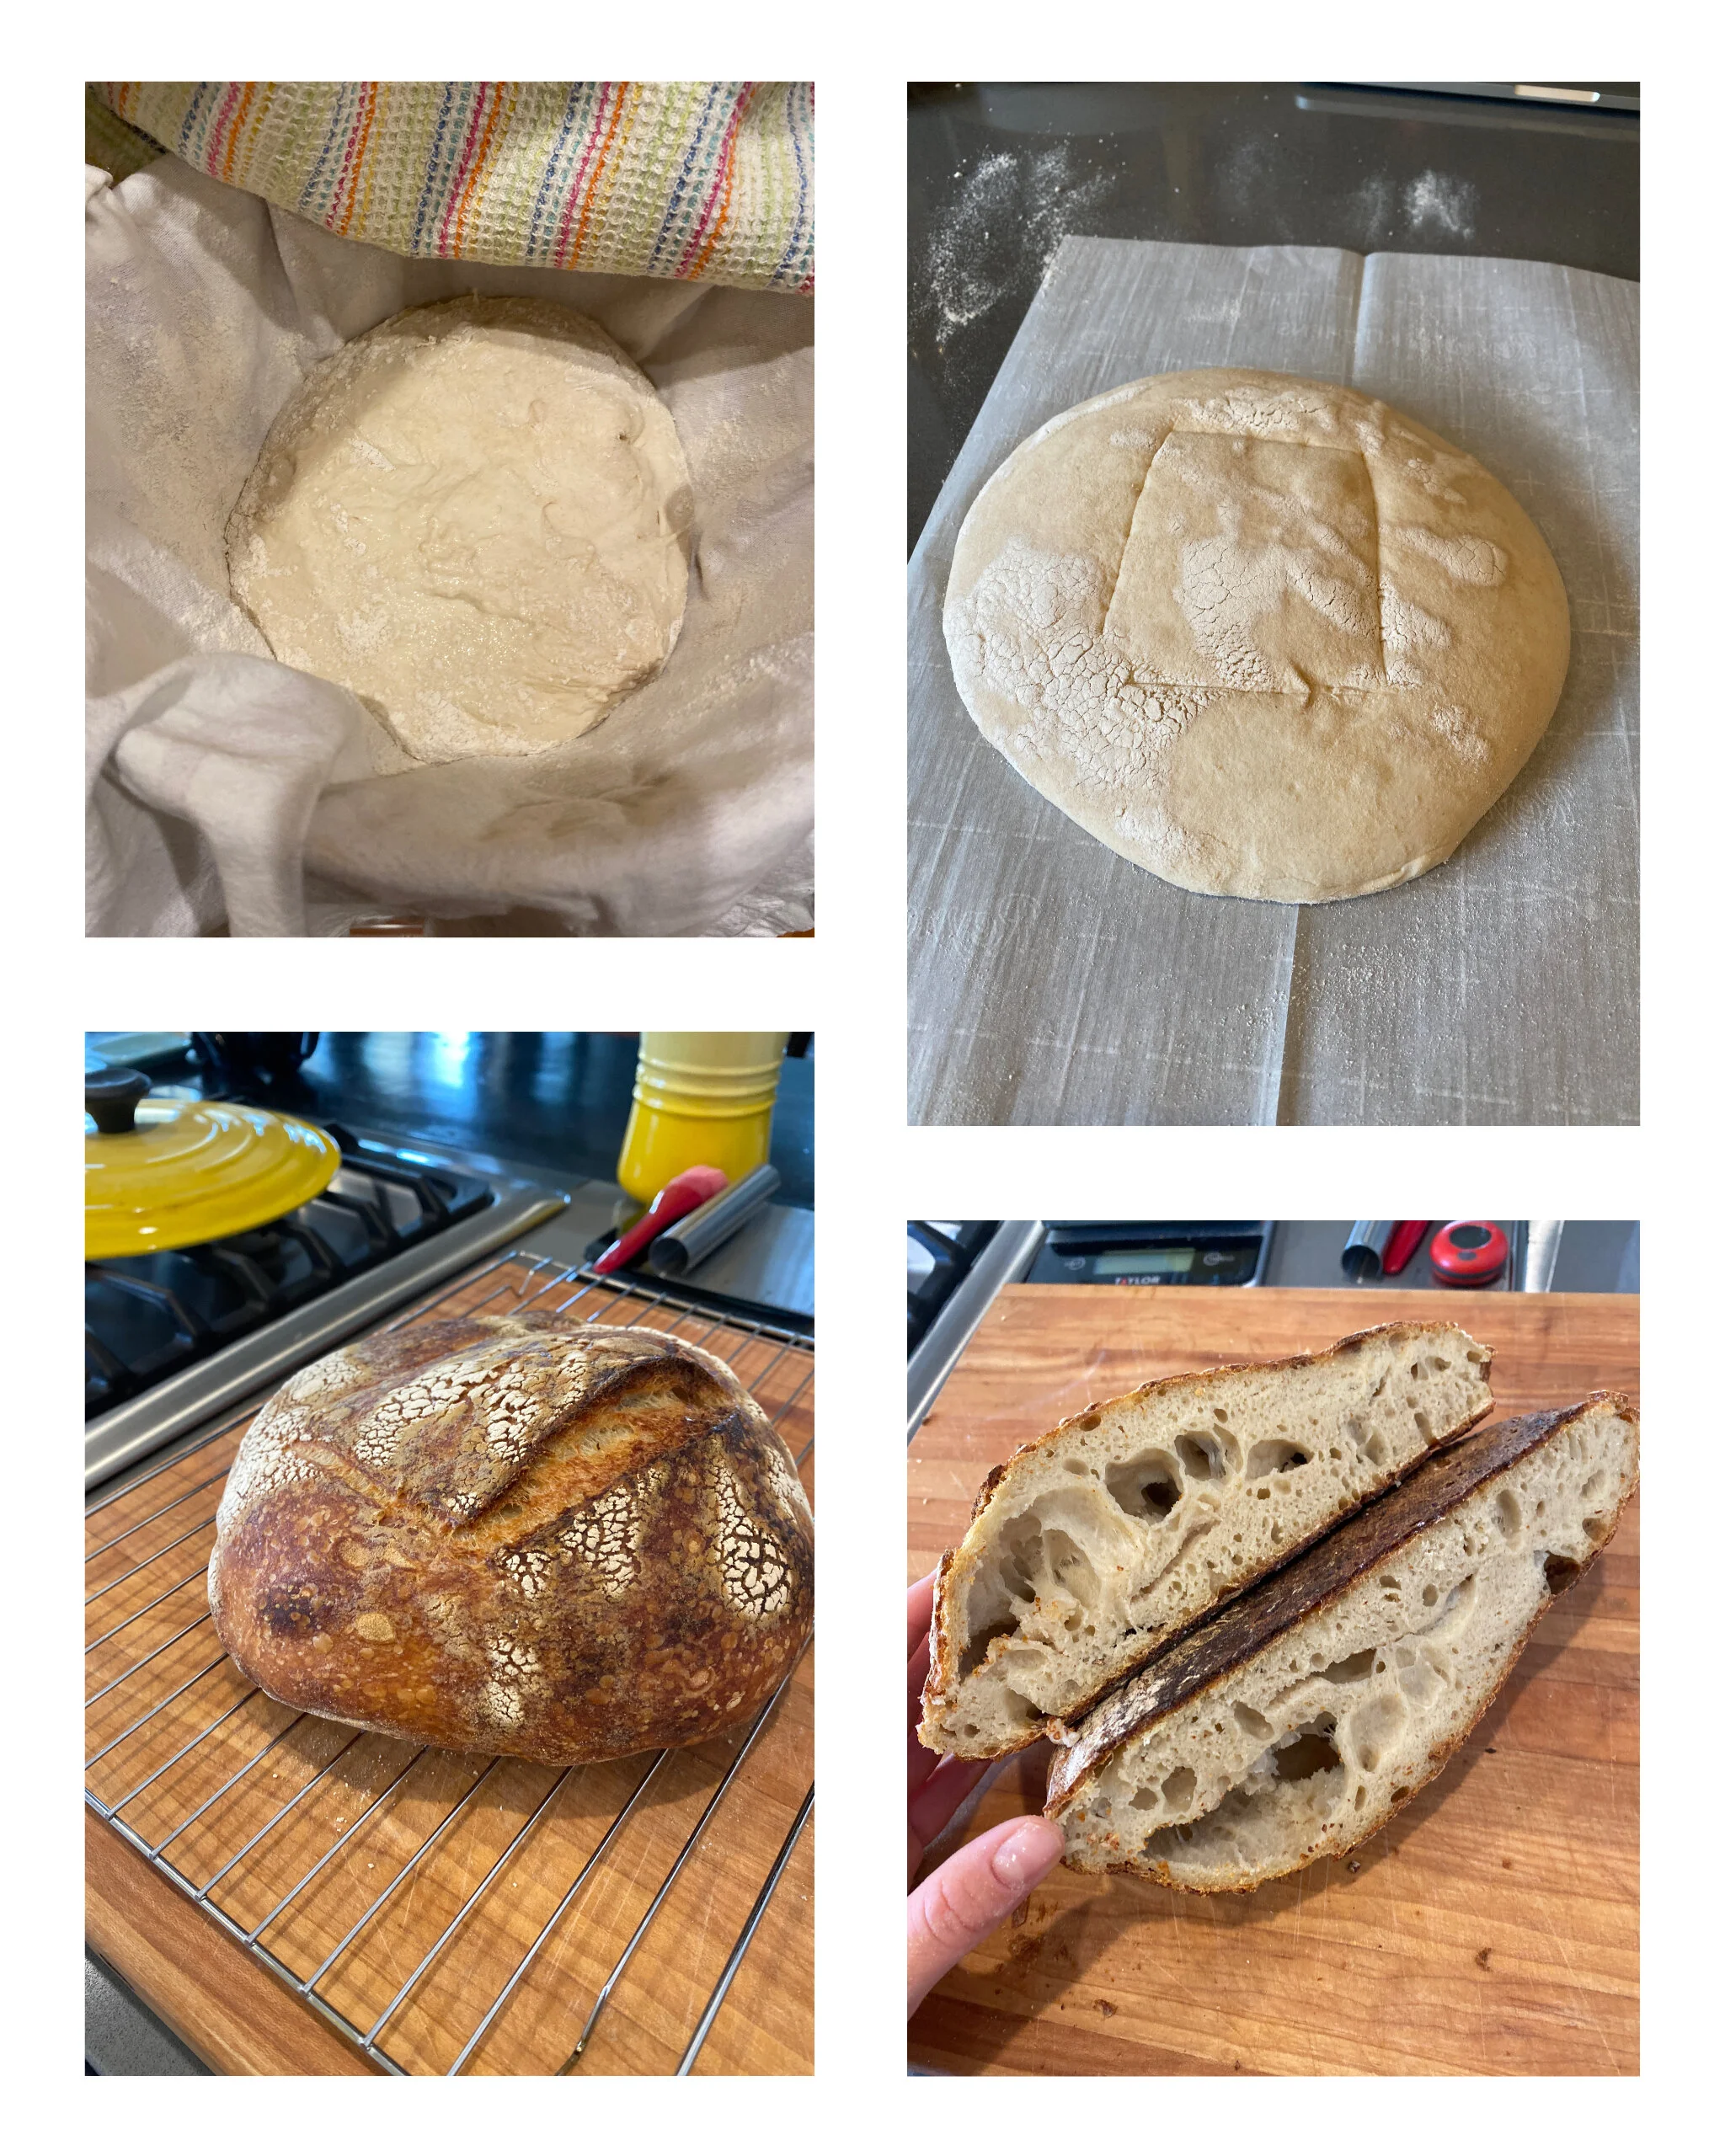
Now you want to gently put your dough in a floured banneton (proofing basket) or a bowl lined with a towel. Dust the towel well with the mix of whole wheat and rice flour, and gently place the dough, top side down, into the container. If it’s in a bowl, fold the towel in on top of the dough and cover the top with plastic wrap. Put the dough in the fridge to let it proof overnight.
After the dough has proofed anywhere from 10 - 15 hours (I’ve done as little as 10 and as many as 15 and it’s always turned out fine), preheat your oven to 500 degrees and put a dutch oven with the lid on inside (make sure you don’t have a lid handle that will melt!).
Once the oven comes to temperature, let the dutch oven hang out in here and heat up for 20 minutes. When the dutch oven has finished pre-heating, take the dough out of the fridge and gently place it on a piece of parchment paper (this isn’t 100% necessary, but it helps me to not burn myself during this process so I think it’s worth it). Brush off any excess flour with a basting brush, and use a lame or a sharp knife to score the bread (I’ve been doing a square for right now, but there are lots of pretty patterns you can do).
Carefully remove the pot from the oven and place the parchment with the bread inside. Put the top back on (DON’T FORGET TO WEAR AN OVEN MITT HERE) and put the whole thing in the oven. Set a timer for 26 minutes and turn the heat down to 450 degrees.
When the timer goes off, take the lid off the pot and allow the bread to bake for another 13 minutes with the lid off. After 13 minutes, take the bread out of the dutch oven and put it directly on the rack (I put mine in upside down) to allow it to get nice and brown and crispy. I keep a close eye on this, and keep it in there anywhere from 3 - 6 minutes.
Cool your bread on a rack and resist the urge to slice into it until it’s done cooling down! I’ve read that the flavor continues to develop as it cools, so it’s definitely important to wait (and I’ve been doing this for my last several loaves and have seen a difference).
To bake your second loaf, put the dutch oven back in the oven and turn the heat back up to 500 degrees. Let it re-heat for another 20 minutes, and then follow the same baking process as above.
That’s it! Haha, all 17 steps.
If you want to make just one loaf (which I definitely recommend when you’re just starting out) here’s the recipe you can use. You also can skip the resting period in step 10 because you won’t have to divide the dough in two.
Ingredients for 1 loaf:
100 g bubbly sourdough starter
325 g 100 degree water + 25 g 100 degree water
150 g whole wheat flour
350 g bread flour
11 g sea salt
olive oil
a mix of whole wheat and rice flour for dusting
Happy baking!
xo,
Julianna